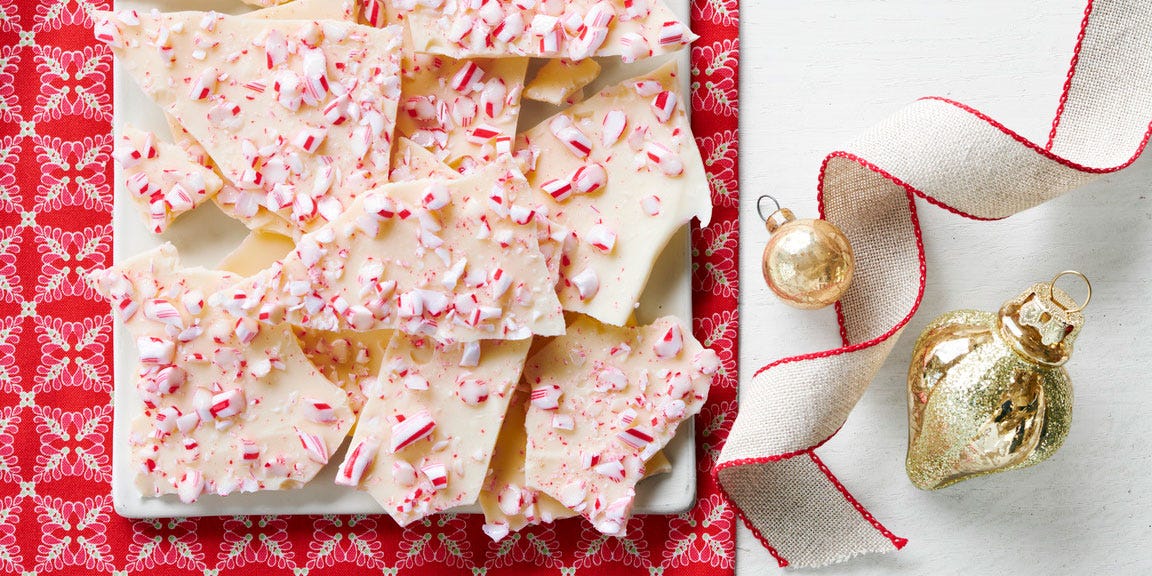
The festive season often brings with it a symphony of familiar scents and flavors, and among the most beloved is the refreshing tingle of peppermint paired with rich, decadent chocolate. There’s something undeniably magical about homemade treats, and a classic peppermint bark recipe stands out as a quintessential holiday confection. This delightful treat, with its striking layers of dark and white chocolate crowned with crushed candy canes, is not just a feast for the taste buds but also a feast for the eyes, making it perfect for gifting, entertaining, or simply indulging yourself.
While store-bought versions are readily available, crafting your own peppermint bark at home is an incredibly rewarding experience. It allows for complete control over the quality of ingredients, the thickness of each layer, and the intensity of the peppermint flavor. Plus, the aroma of melting chocolate and peppermint filling your kitchen is an instant mood booster, signaling that the holidays have truly arrived. In this comprehensive guide, we’ll explore everything you need to know to create the perfect batch of peppermint bark, from selecting the best ingredients to mastering the layering technique and even venturing into creative variations.
The Timeless Appeal of Homemade Peppermint Bark
Peppermint bark holds a special place in the hearts of many during the holiday season. Its popularity isn't just a recent phenomenon; it's a testament to the simple yet exquisite combination of flavors and textures. The crisp snap of the chocolate, followed by the cool burst of peppermint, creates a sensory experience that is both comforting and exhilarating. Making your own peppermint bark isn't just about saving money; it's about infusing your treats with personal touch and love. Homemade bark often tastes fresher, with more vibrant flavors, and you can tailor it exactly to your preferences – perhaps a thicker dark chocolate layer, or a more generous sprinkle of candy canes.
Beyond its delicious taste, peppermint bark also offers incredible versatility. It makes for stunning homemade gifts, effortlessly packed into festive tins or cellophane bags. It’s also a wonderful addition to any holiday dessert spread, standing out with its festive colors and unique texture. The process itself is relatively straightforward, making it an ideal project for bakers of all skill levels, including those new to candy making. It’s a wonderful way to involve family members, especially children, in the holiday preparations, crushing candy canes being a particularly fun task for little hands (under supervision, of course!).
Essential Ingredients for Your Perfect Peppermint Bark Recipe
The success of your peppermint bark hinges significantly on the quality of your ingredients. While the ingredient list is short, making smart choices here will elevate your final product from good to truly exceptional. Let's break down what you'll need:
- High-Quality Chocolate: This is arguably the most crucial component. You'll need two types:
- Dark Chocolate: Opt for a good quality dark chocolate with a cocoa content between 60-75%. This provides a robust, slightly bitter base that beautifully contrasts with the sweet white chocolate and peppermint. Chocolate bars or wafers designed for melting work best, as chocolate chips often contain stabilizers that prevent smooth melting.
- White Chocolate: For the top layer, choose a high-quality white chocolate or white chocolate coating. Look for brands that list cocoa butter as a primary ingredient, as this indicates better flavor and melting properties. Avoid "white confectionery coating" if possible, as it often contains vegetable fats instead of cocoa butter, resulting in a less desirable texture and taste.
- Peppermint Candies (Candy Canes): Crushed candy canes are the star of the show. You'll need enough to generously sprinkle over the white chocolate layer. Make sure they are fresh and not sticky. Approximately 10-15 standard-sized candy canes should suffice for a large batch.
- Peppermint Extract: This provides the intense peppermint flavor. Use a good quality pure peppermint extract, not a mint extract (which can taste more like spearmint). A little goes a long way, so start with a small amount and add more to taste.
- Optional: Shortening or Coconut Oil: A tiny bit (about 1 teaspoon per 12 ounces of chocolate) can help thin out the melted chocolate, making it easier to spread smoothly, and also contributes to a nice shine and snap.
Remember, investing in good quality chocolate will pay dividends in flavor and texture. Avoid cheap chocolates that often have an overly waxy mouthfeel.
Step-by-Step Guide to Crafting Delicious Peppermint Bark
Making peppermint bark is more about technique than complexity. Follow these steps for a beautiful, delicious result:
Preparing Your Workspace and Ingredients
Before you begin melting, get everything ready. Line a large baking sheet (about 10x15 inches or larger, depending on how thick you want your bark) with parchment paper or a silicone baking mat. This will make it easy to remove the finished bark. Next, crush your candy canes. You can place them in a sturdy freezer bag and gently pound them with a rolling pin or meat mallet until you have a mix of fine crumbs and small, recognizable pieces. Don't over-crush them into a powder; you want some texture.
Melting the Chocolate Layers
The key to smooth, glossy bark is properly melted chocolate. There are two primary methods:
- Double Boiler Method: This is the most controlled way to melt chocolate. Fill a saucepan with about an inch or two of water and bring it to a simmer. Place a heatproof bowl (glass or metal) over the saucepan, ensuring the bottom of the bowl doesn't touch the water. Add your chopped dark chocolate to the bowl. Stir occasionally until completely melted and smooth. Remove from heat immediately.
- Microwave Method: This is quicker but requires more attention. Place chopped dark chocolate in a microwave-safe bowl. Microwave in 30-second intervals, stirring thoroughly after each interval, until the chocolate is mostly melted. Stir vigorously until completely smooth. Be careful not to overheat, as chocolate can seize and become unusable.
Once your dark chocolate is melted, stir in about 1/2 teaspoon of peppermint extract (and optional shortening/coconut oil, if using). Pour the melted dark chocolate onto your prepared baking sheet and spread it evenly into a thin layer using an offset spatula. Place the baking sheet in the refrigerator for 15-20 minutes, or until the dark chocolate is firm but not overly chilled.
Repeat the melting process for the white chocolate, adding the remaining 1/2 teaspoon of peppermint extract (and optional shortening/coconut oil). Ensure the white chocolate is fully melted and smooth. Let it cool for a minute or two to prevent it from melting the dark chocolate layer underneath when poured.
Assembling and Setting the Bark
Retrieve your chilled dark chocolate layer. Carefully pour the slightly cooled white chocolate over the dark chocolate, spreading it gently and evenly to the edges. Before the white chocolate sets, generously sprinkle the crushed candy canes over the entire surface. Press them lightly into the white chocolate to ensure they adhere well.
Return the baking sheet to the refrigerator for at least 30-60 minutes, or until both chocolate layers are completely firm and set. This chilling process is crucial for a clean snap when broken.
Breaking and Storing Your Peppermint Bark
Once fully set, remove the bark from the refrigerator. Gently lift the parchment paper or silicone mat from the baking sheet. Place the bark on a clean cutting board. Using your hands, snap the bark into irregular pieces. For cleaner cuts, you can use a sharp knife, but the beauty of bark lies in its rustic, broken appearance.
Store your homemade peppermint bark in an airtight container at cool room temperature (around 65-70°F / 18-21°C) for up to two weeks, or in the refrigerator for up to a month. If storing in the refrigerator, allow it to come to room temperature for a few minutes before serving to enjoy the best texture and flavor. To avoid the candy canes becoming sticky or dissolving, ensure the container is truly airtight and protected from humidity.
Tips, Tricks, and Creative Variations for Your Peppermint Bark Recipe
Even a simple peppermint bark recipe can be elevated with a few clever tricks and creative twists:
- Avoid Overheating Chocolate: Chocolate, especially white chocolate, can seize if overheated or if even a tiny drop of water gets into it. Melt slowly and gently.
- Control Peppermint Extract: Peppermint extract is potent! Start with less than you think you need and add more to taste. Too much can make your bark taste like toothpaste.
- Even Spreading: For a uniform bark, ensure your chocolate layers are spread evenly. An offset spatula is your best friend here.
- Swirl Effect: For an artistic touch, after spreading the white chocolate, drizzle a small amount of melted dark chocolate (or even food-colored white chocolate) over the top and swirl gently with a skewer or toothpick before sprinkling the candy canes.
- Alternative Toppings: While candy canes are traditional, consider other toppings like crushed peppermint patties, mini chocolate chips, sprinkles, or even a dusting of cocoa powder.
- Different Chocolate Combinations: Experiment with milk chocolate as a base, or use a combination of milk and dark chocolate for a milder flavor profile.
- Add a Salty Crunch: For a delightful sweet-and-salty combination, sprinkle some crushed pretzels or flaky sea salt over the dark chocolate layer before it sets, or mix it into the white chocolate.
- Make it Vegan: Use good quality vegan dark and white chocolates, and ensure your candy canes are naturally colored and free from animal products.
- Gifting Presentation: Arrange pieces in a clear cellophane bag tied with a festive ribbon, or layer them in a decorative tin with parchment paper between layers to prevent sticking.
Making homemade peppermint bark is a joyful holiday tradition that results in a beautiful, delicious, and deeply satisfying treat. By choosing quality ingredients and following these simple steps, you can create a batch that rivals any gourmet store-bought version. Whether you're making it for gifting, entertaining, or simply to enjoy the festive spirit, your homemade peppermint bark is sure to be a holiday highlight. So, gather your ingredients, turn on some holiday music, and get ready to create some sweet holiday magic!
